What is Turnitin?
Turnitin is a text-matching tool used at Queen's University. Students upload papers to receive Similarity Reports that show text matches to the following sources:
- Student paper repository
- Current and archived website content
- Periodicals, journals, and publications
Turnitin has three main tools:
- SimilarityCheck: text-matching tool that presents results in the Similarity Report.
- GradeMark: a tool for digital assessment (annotations, comments, and grades).
- PeerMark: a tool for peer-assessment of assignments (not available in onQ).
Please consult our Turnitin Frequently Asked Questions (FAQ) page for further information.
Enable Turnitin in Your Course
Turnitin can be enabled in the Course Creation Tool+ when creating a new course or after the course has been created.
For instructions on creating your course and enabling Turnitin, please see the Create a Course tutorial.
Or
If you have already created your course and would like to enable Turnitin, see Add Resources To an Existing Course. Select the Turnitin option.
Before you start...
Instructors must agree to the Instructor Conditions of Turnitin Use at Queen's University including adding the Student Statement to the course syllabus. See below:
Turnitin Statement
This course makes use of Turnitin, a third-party application that helps maintain standards of excellence in academic integrity. Normally, students will be required to submit their course assignments through onQ to Turnitin. In doing so, students’ work will be included as source documents in the Turnitin reference database, where they will be used solely for the purpose of detecting plagiarized text in this course. Data from submissions is also collected and analyzed by Turnitin for detecting Artificial Intelligence (AI)-generated text. These results are not reported to your instructor at this time but could be in the future.
Turnitin is a suite of tools that provide instructors with information about the authenticity of submitted work and facilitates the process of grading. The similarity report generated after an assignment file is submitted produces a similarity score for each assignment. A similarity score is the percentage of writing that is similar to content found on the internet or the Turnitin extensive database of content. Turnitin does not determine if an instance of plagiarism has occurred. Instead, it gives instructors the information they need to determine the authenticity of work as a part of a larger process.
Please read Turnitin’s Privacy Policy, Acceptable Use Policy and End-User License Agreement, which govern users’ relationship with Turnitin. Also, please note that Turnitin uses cookies and other tracking technologies; however, in its service contract with Queen’s Turnitin has agreed that neither Turnitin nor its third-party partners will use data collected through cookies or other tracking technologies for marketing or advertising purposes.
For further information about how you can exercise control over cookies, see Turnitin’s Privacy Policy.
Turnitin may provide other services that are not connected to the purpose for which Queen’s University has engaged Turnitin. Your independent use of Turnitin’s other services is subject solely to Turnitin’s Terms of Service and Privacy Policy, and Queen’s University has no liability for any independent interaction you choose to have with Turnitin.
Portions of this document have been adapted, with permission, from the University of Toronto Centre for Teaching Support and Innovation tip sheet “Turnitin: An Electronic Resource to Deter Plagiarism”.
For Instructors
- Instructor onQ - View Similarity Scores and Similarity Reports
- Instructor onQ - Commenting Tools
- Instructor onQ - Understanding the Similarity Report
For Students
To help you assist your students in using Turnitin you can refer them to the Turnitin onQ Support pages or download the Student Turnitin Help documents and add them to your course.
The following video provides step-by-step instructions to create an assignment submission folder:
Note: Turnitin can be accessed by expanding Evaluation & Feedback.
To create an an Assignment Submission folder with Turnitin enabled:
- On the navbar, select Assignments under the Assessments tab.
- On the Assignments page, click New Assignment.
To save your progress at any point, click Save. - Enter a Name for the assignment.
- Enter a Score Out of. The grade item is automatically added to your gradebook.
- Set a Due Date.
- Enter assignment instructions.
- Expand Availability Dates & Conditions.
- Set a Due Date.
- Expand Submission & Completion.
- For the Assignment Type, specify if this is an Individual Assignment or Group Assignment.
Note: You must have groups set up in your course to set an assignment as a group assignment. - Select a Submission Type.
- Expand Evaluation & Feedback.
- Scroll down to Turnitin Integration, click Manage Turnitin.
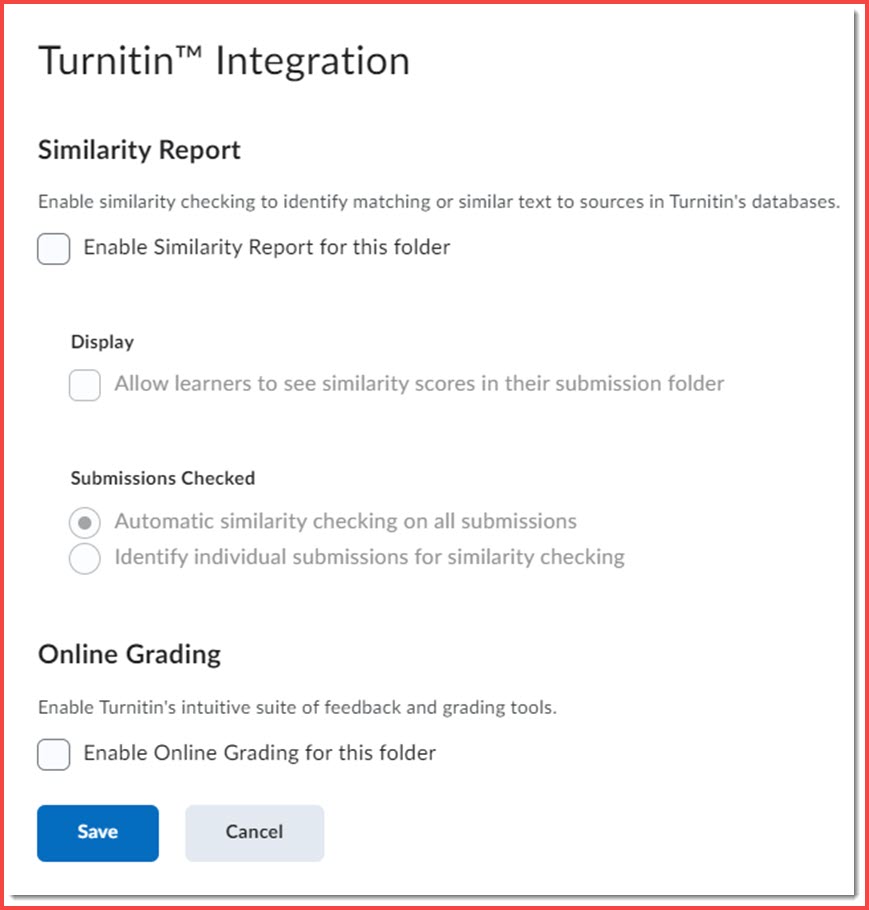
To enable the Turnitin integration:
Note: Turnitin reporting will not be available if the Similarity Report is not enabled.
- Ensure the Enable Similarity Report for this folder option is checked.
- Under Display, select Allow learners to see similarity scores in their Assignment folder if required.
- Under Submissions Checked, select Automatic similarity checking on all submissions.
- Under Online Grading, select Enable Online Grading for this folder. From Transfer select, Automatically sync grades as Draft in onQ.
- To customize the assignment further and find Turnitin's optional settings, select the More Options in Turnitin button.
- Click Save..
- To exit the Assignment click Save and Close.
After creating the Assignment Submission folder, with Turnitin enabled the folder settings will transfer to the Turnitin Assignment settings page.
- The assignment Title and Max Grade will be automatically populated with the information from the assignment folder.
- Now click the Optional Settings, the page will now expand revealing additional options.
Submission Settings
Submission Storage Options
There are two options regarding submissions:
- Turnitin standard paper repository
- Do not store the submitted papers
Allow Late Submissions
The Allow Late submissions option allows students to submit work after the due date. The default is set to Yes. If you do not want late submission set Has End Date in the Assignment Submission folder settings.
Enable Anonymous Marking
Anonymous Marking is NOT available in this integration.
Enable E-Rater Grammar Check
This feature of assignment creation provides instructors with the option to enable the e-rater grammar and spelling check for all submissions to the assignment. When enabled student submissions receive detailed grammar feedback in GradeMark automatically through the e-rater technology. Select Yes to enable the e-rater engine for the assignment.
If grammar checking is enabled the following options are available:
- (Optional) Select the ETS handbook level from the drop-down menu. The ETS handbooks provide students with in-depth information about the grammar errors the e-rater technology finds in their paper.
- Select the dictionary used for the spelling check.
- The Categories enabled by default option allows instructors to choose which categories of feedback are enabled when viewing assignment submissions in GradeMark. The default is to show the feedback for every category.
Attach a Rubric to the Assignment (Turnitin Rubric)
- Select a previously created or imported rubric to the assignment by clicking the drop-down menu to add the required rubric to the assignment.
or
- Create a new rubric to attach to the assignment by clicking on the Launch Rubric Manager button.
Compare Against
Compare Submitted Papers Across the Following Sources
The instructor can select the available repository sources to compare submissions in the assignment against. This allows an instructor to disregard a source type if the comparison against this type of source is not needed.
There are three database search options:
- Check against Student paper repository.
- Check against Current and archived web site content.
- Check against the Periodicals, journals and publications.
The default is to enable searching against all available repository sources.
Similarity Report
Similarity Report Generation and Resubmissions
There are three options for generating Similarity Reports for student submissions:
Generate reports immediately, students cannot resubmit
Similarity Reports for all submissions will be generated immediately. Students cannot resubmit papers. Submissions must be deleted by the instructor to enable resubmission.
RECOMMENDED: Generate reports immediately, students can resubmit until the due date
Similarity Reports for the initial 3 submissions by each student user to this assignment will be generated immediately. After the first 3 submissions reports will take 24 hours to generate. Students may resubmit as often as the student wishes until the assignment due date.
Generate reports on due date NOT RECOMMENDED
Similarity Reports will not be generated for any submission until the due date and time of the assignment. Students may resubmit as many times as needed until the due date and time without receiving reports. Resubmissions may not be made after the due date and time of the assignment.
Allow Students to view Similarity Reports
This setting is enabled by checking Allow learners to see similarity scores in their submission folder under the Turnitin tab. This feature of assignment creation provides instructors with the ability to control the option to allow students to see Similarity Reports within each created assignment.
Additional Settings
Enable Peermark
PeerMark is NOT available in this integration.
Save these settings for future use
“Would you like to save these options as your defaults for future assignments”? Select Yes to have all future assignments use the advanced assignment options that have been selected as the default setting. Select no to continue with the previous default advanced assignment option settings.
The default settings can be changed at any time when creating a new assignment or updating an existing assignment.
Click the Submit button to save any changes to the assignment settings.
The following video provides step-by-step instructions on how to view the similarity score of a submitted assignment:
To view Student Assignment Submissions and the Turnitin Similarity Score:
- On the navbar, select Assignments under the Assessments tab.
- Select the Assignment Submission Folder containing the submissions you wish to view.
- Click the black drop-down arrow to the right of the Assignment Submission Folder name and select View Submissions.
- Scroll to the bottom of the page to view a list of submissions.
- The Similarity score for each assignment will be shown in the Turnitin Similarity column. By clicking on the Turnitin Similarity score you will access the Turnitin Similarity Report.
- To grade the assignment using Turnitin GradeMark click on the Pencil icon to access the Turnitin Similarity Report.
Note: If the report is not ready you will see In Progress in the Turnitin Similarity column for that assignment.
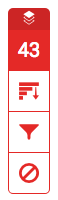
LEGEND
The icons indicate the percentage of the similarity score and the corresponding colour on a blue (0%) to red scale (100%).
Blue: No matching text.
Green: One word to 24% matching text.
Yellow: 25% to 29% matching text.
Orange: 50% to 74% matching text.
Red: 75% to 100% matching text.
To view the student submission and Similarity Report:
- If you want to open the Turnitin Similarity Report click on the Turnitin Similarity score.
- If you want to open the onQ Evaluate Submission window click Evaluate.
- If you selected to open the onQ Evaluate Submission window you can access the Turnitin Similarity Report by clicking on the Turnitin Similarity.
- The student submission will now open in Turnitin Feedback Studio and you will see the Similarity Report.
Note: The Assignment Submission Folder must have a grade item associated with it to enable the transfer of the grade in Turnitin GradeMark to the onQ Gradebook.
- To grade in Turnitin access the student submission by following the instructions to View Student Submission and Similarity Report.
- The Similarity Report should open in a new browser tab. Once you have finished using the commenting tools in the paper you can enter a grade.
- The grade item is available in the Similarity Report in the top right-hand corner.
- Enter the grade by clicking the _ _. Turnitin Feedback Studio will auto-save the grade.
- The grade will also be sent to the onQ score in the Evaluate submissions window and saved as Draft by default.
- When you are ready to publish all grades go back to the Assignment Submissions.
- To select ALL submissions to publish check the Select all rows
- Click on Publish Feedback. All Grademark feedback will now be released to students.
- Click Back to Folder Submissions to go to the next student submission to evaluate.
| INLINE COMMENTS | |
|---|---|
|
|
|
 |
|
DELETING AN INLINE COMMENT
|
|
|
|

| STRIKETHROUGH TEXT | |
|---|---|
|
|
|
DELETING A STRIKETHROUGH
|
|
|
|
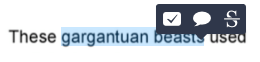
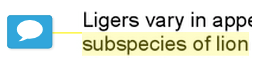
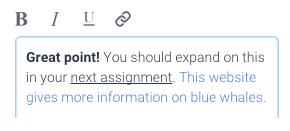
| BUBBLE COMMENTS | ||
|---|---|---|
|
|
|
|
|
|
|
|
|
|
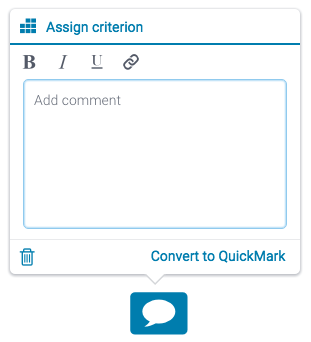
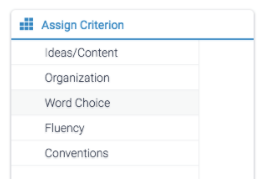
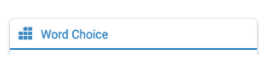
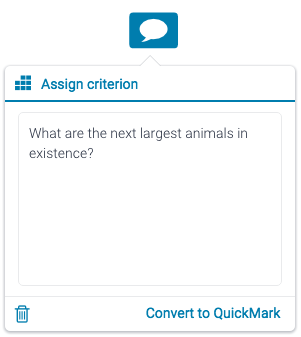
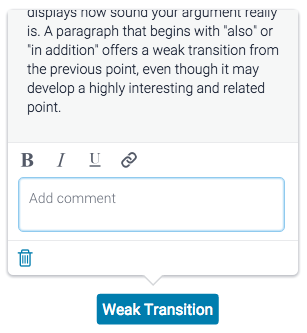
ASSIGNING CRITERIA TO A BUBBLE COMMENT If you've attached a rubric or grading form to your assignment, you can assign any of the criteria in your rubric or grading form to a bubble comment. The bubble comment will generally be linked to the theme or topic of the rubric criterion. Note: The Assign Criterion option will only appear within your bubble comment options if a rubric or grading form is attached to the assignment you are marking. Learn how to attach a rubric or grading form here. |
||
Note: To remove the assigned criterion from the bubble comment, return to this step and click the selected criterion to remove it. |
|
|
|
|
|
|
|
|
|
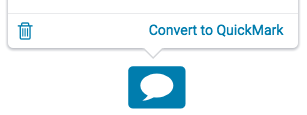
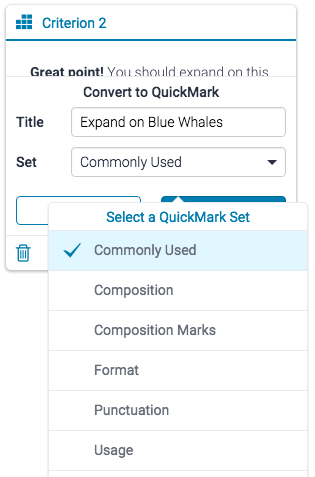
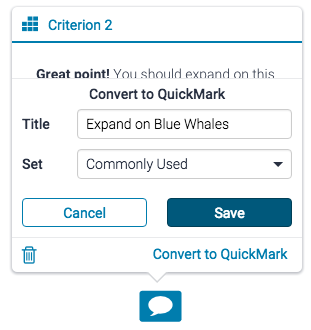
CONVERTING A BUBBLE COMMENT TO A QUICKMARK
|
|
|
|
|
|
|
|
|
Note: To edit the description of the QuickMark, navigate to the QuickMark manager and edit it from within the set you have just assigned. |
|
|
|
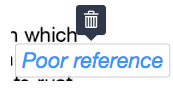
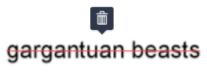
DELETING A BUBBLE COMMENT
|
|
|
|
|
|
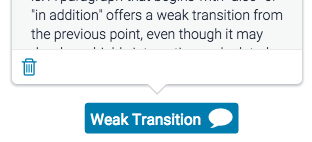
| QUICKMARKS COMMENTS | |
|---|---|
|
QuickMarks allow you to create a library of feedback that might be applicable, on multiple occasions, to multiple students, across multiple classes and assignments. |
|
|
|
|
|
|
|
|
|
|
|
|
|
|
ADDING A QUICKMARK FROM THE SIDE PANEL You are also able to add QuickMarks by using the side panel. One of the most useful features that is accessible by adding QuickMarks via the side panel is the ability to search through all the QuickMarks currently attached to the account. |
|
|
|
|
|
|
DELETING AN INLINE COMMENT
|
|
|
|
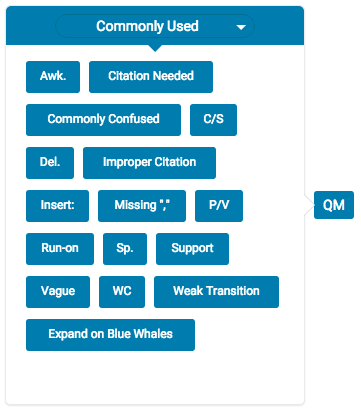
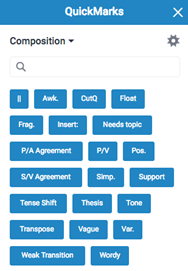
QuickMarks allows the instructor to create a library of subject-specific feedback comments that can be saved, reused, and shared. A QuickMark may be a word or phrase, or may even be an abbreviation. QuickMarks can be downloaded and then shared with TAs by importing the QuickMark set into their Turnitin QuickMark Manager account.
To learn how to use QuickMarks view QuickMarks Comments above.
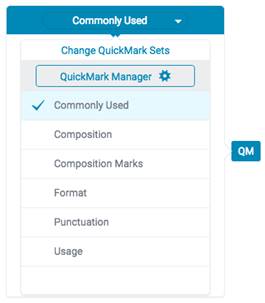
QuickMark Manager
The QuickMark Manager stores every QuickMark that has been created by you, and also stores any QuickMarks that have shared with your account.
You can perform the following actions in the QuickMark Manager:
- create new QuickMark sets;
- create new QuickMarks;
- edit QuickMarks or sets;
- hide or delete sets;
- delete comments from sets;
- upload and download sets; and
- archive QuickMarks.
To access the QuickMark Manager
Steps to Export (download) a QuickMark Set
- Login to onQ and navigate to one of your courses where you have an existing Turnitin Assignment with student submissions.
- On the navbar, select Assignments under the Assessments tab.
- Select the Assignment Submission Folder containing the submissions you wish to view.
- Click the black drop-down arrow to the right of the Assignment Submission Folder name and select View Submissions.
- Click on the View Similarity Report for one student submission. This will launch the TurnitinFeedback Studio.
- Click on the QuickMarks checkbox that will give you access to all of the default QuickMarks sets and any you have created.
- Click on Settings Cog in the top right corner.
.png)
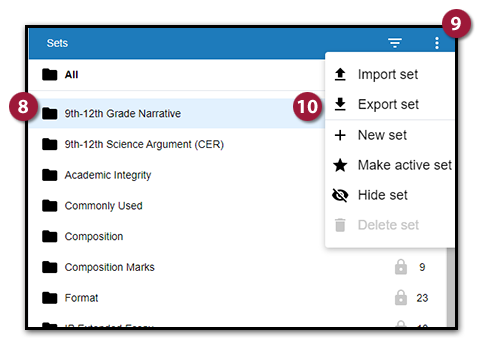
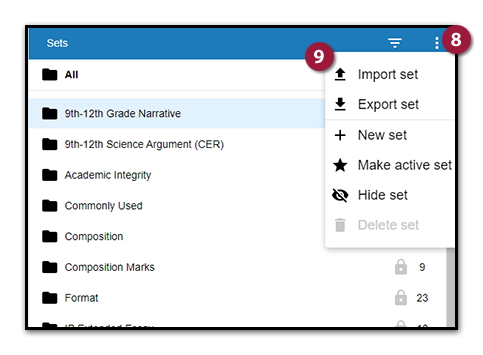
- Select the name of a QuickMark set to download.
- Open the 3 Dots menu in the top right corner of the Sets panel.
- Select Export set. This will download the QuickMark set as a .qms file.
Steps to Import (upload) a QuickMark Set
- Login to onQ and navigate to one of your courses where you have an existing Turnitin Assignment with student submissions.
- On the navbar, select Assignments under the Assessments tab.
- Select the Assignment Submission Folder containing the submissions you wish to view.
- Click the black drop-down arrow to the right of the Assignment Submission Folder name and select View Submissions.
- Click on the View Similarity Report for one student submission. This will launch the TurnitinFeedback Studio.
- Click on the QuickMarks checkbox that will give you access to all of the default QuickMarks sets and any you have created.
- Click on Settings Cog in the top right corner.
- Open the 3 Dots menu in the top right corner of the Sets panel.
- Select Import set.
- Select the Browse link, locate and select the sets to upload from your device, then select Open.
Alternatively, locate the Quickmark set files to be uploaded from your device. Hold-click the files, then drag and release over the gray box in the left panel of the QuickMark - The selected set of files will appear below the gray box. Choose the Upload button to import the QuickMark sets.
- Once the sets have finished uploading, select Close to confirm and return to the QuickMark Manager.
Now you are ready to use your QuickMark Set(s).
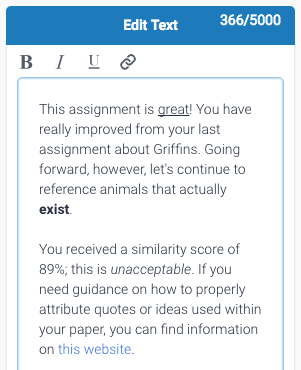
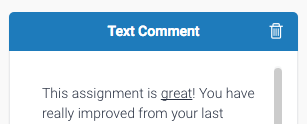
| TEXT COMMENTS | |
|---|---|
|
|
|
|
Note: Your comment will automatically save, so you don't have to worry about being timed out. |
|

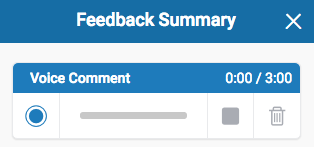
| VOICE COMMENTS | |
|---|---|
|
|
|
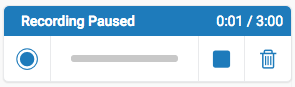
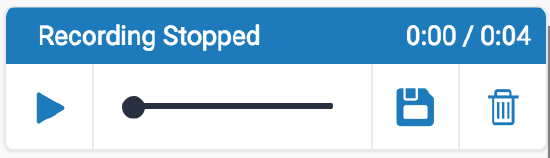
VOICE COMMENTS
Note: You may have to authorize the use of your computer's microphone before you can begin recording. |
|
|
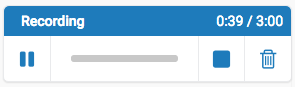 |
Warning: Changing the active paper, or closing the page, will abandon any partially completed audio comment.
|
|
|
|

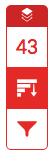
| MATCH OVERVIEW | |
|---|---|
|
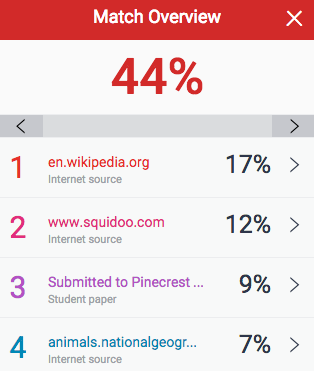
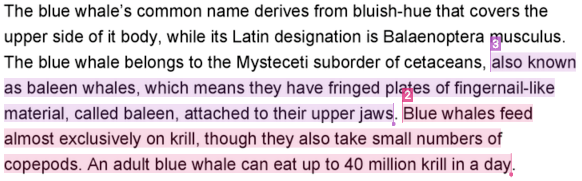
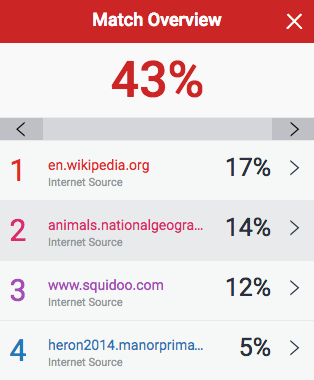
The Match Overview gives you a breakdown of all the matches that have been found in the paper and allows you to clearly view the similarity score. Matches are ordered by the highest instance of similarity down to the lowest. Each match has a colour and a number attached to it. These colour tags will help you to find the match on the paper itself. |
|
|
|
|
|
|
|
|
|
|
|
|
|
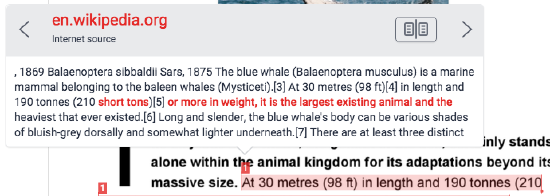
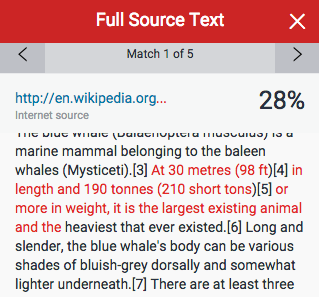
| VIEWING SOURCE DETAILS | |
|---|---|
|
|
|
|
|
|
|
|
|
|

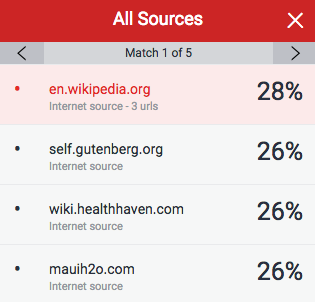
| ALL SOURCES | |
|---|---|
|
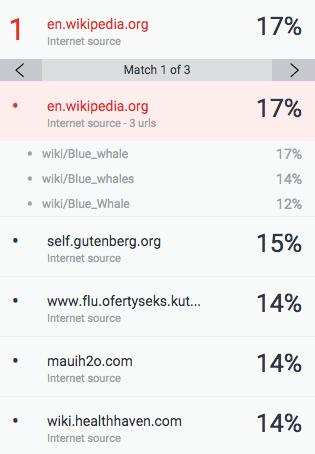
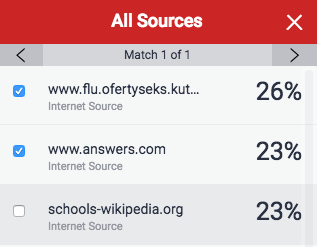
In the All Sources side panel, all of the sources that have been found are displayed and sorted by highest percentage to lowest percentage match. Clicking on any source will change the navigation bar at the top of the page, displaying how many times that this source has matched in the paper. Clicking the arrows will allow you to see where these have matched on the page. You can further refine this navigation by clicking on an individual page within a source; this will simply show you matches from that specific sub-source. |
|
|
|
|
|
|
|
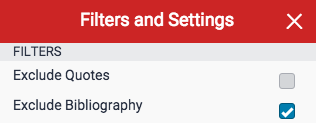
| CHANGING FILTERS AND SETTINGS | |
|---|---|
|
You may apply several different filters to your report, should you wish to make any exclusions. |
|
|
EXCLUSION BY TEXT TYPE
|
|
|
|
|
|
|
EXCLUSION BY NUMBER
|
|
|
|
|
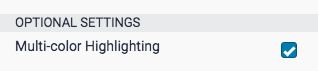
REPORT MULTI-COLOUR HIGHLIGHTING
|
|
|
|
|
|

| EXCLUDING SOURCES VIA MATCH OVERVIEW | |
|---|---|
|
You may apply several different filters to your report, should you wish to make any exclusions. |
|
|
|
|
|
|
|
|
|
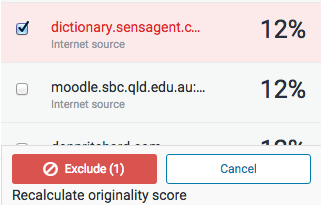
Note: By clicking the Exclude (x) button, this will recalculate the similarity score. |
|

| EXCLUDING SOURCES VIA ALL SOURCES | |
|---|---|
|
You may apply several different filters to your report, should you wish to make any exclusions. |
|
|
|
|
|
|
|
Note: By clicking the Exclude (x) button, this will recalculate the similarity score. |
|

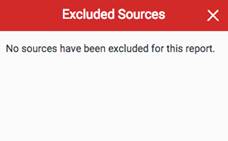
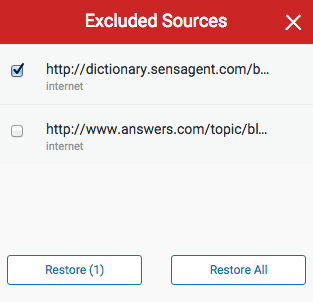
| VIEWING EXCLUDED SOURCES | |
|---|---|
|
You may apply several different filters to your report, should you wish to make any exclusions. |
|
|
|
|
|
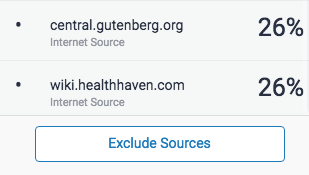
Note: You do not need to refresh the Similarity Report to see these sources reflected in the similarity score. |
|
Last updated: July 2023
The use of Turnitin by our instructors is completely voluntary.
Please read Turnitin’s Privacy Policy, Acceptable Use Policy and End-User License Agreement, which govern users’ relationship with Turnitin.
Since April 2023, Turnitin automatically checks submitted assignments for AI-generated text. Queen’s is currently evaluating the efficacy of this detection tool, and as such the reports are not currently available. Queen’s has reviewed and verified that the use of submitted data complies with our agreement with the vendor. Additional information about the AI detection tool is explained in this FAQ.
Instructors wishing to use Turnitin in their courses must follow these conditions of use:
- Instructors must exercise their independent professional judgment in, and assume responsibility for, determining whether a text has been plagiarized or not. Turnitin does not determine if an act of plagiarism has occurred; rather, Turnitin can only assist in detecting textual similarities between compared works, as well as flag text believed to be generated by artificial intelligence (noting that the AI writing detection capability is not currently available to instructors).
- All students must be informed at the start of the course that the instructor will be using Turnitin. Turnitin cannot be used for spot-checking individual student work when the tool is not used for all student assignments.
- It is recommended that instructors also take the opportunity at the outset of the course to discuss the use of Turnitin and the issue of academic integrity with students.
- If a student objects to the use of Turnitin, they must advise the instructor at the beginning of the course and make arrangements for different assessment or alternative strategies to ensure the integrity of the work. In such instances, the instructor is still expected to ensure the integrity of the work, including using the following methods:
- check the assignment using manual internet searches;
- implement an alternative assignment such as requiring:
- annotated bibliographies from students;
- students to submit all rough work with their written submission;
- students include citations of all sources utilized in their paper;
- developing an alternate assessment that allows students to demonstrate the achievement of the same course-level learning outcomes as the original assignment.
- No current evidence exists that shows that any third-party AI-detection tools reliably work to detect text generated by artificial intelligence. Do not use such tools as a strategy to ensure the integrity of submitted work. Submitting students’ work to AI detection software without student permission is a breach of the student’s privacy and intellectual property.
- The course syllabus must include the following statement:
Turnitin statement
This course makes use of Turnitin, a third-party application that helps maintain standards of excellence in academic integrity. Normally, students will be required to submit their course assignments through onQ to Turnitin. In doing so, students’ work will be included as source documents in the Turnitin reference database, where they will be used solely for the purpose of detecting plagiarized text in this course. Data from submissions is also collected and analyzed by Turnitin for detecting Artificial Intelligence (AI)-generated text. These results are not reported to your instructor at this time but could be in the future.
Turnitin is a suite of tools that provide instructors with information about the authenticity of submitted work and facilitates the process of grading. The similarity report generated after an assignment file is submitted produces a similarity score for each assignment. A similarity score is the percentage of writing that is similar to content found on the internet or the Turnitin extensive database of content. Turnitin does not determine if an instance of plagiarism has occurred. Instead, it gives instructors the information they need to determine the authenticity of work as a part of a larger process.
Please read Turnitin’s Privacy Policy, Acceptable Use Policy and End-User License Agreement, which govern users’ relationship with Turnitin. Also, please note that Turnitin uses cookies and other tracking technologies; however, in its service contract with Queen’s Turnitin has agreed that neither Turnitin nor its third-party partners will use data collected through cookies or other tracking technologies for marketing or advertising purposes.
For further information about how you can exercise control over cookies, see Turnitin’s Privacy Policy.
Turnitin may provide other services that are not connected to the purpose for which Queen’s University has engaged Turnitin. Your independent use of Turnitin’s other services is subject solely to Turnitin’s Terms of Service and Privacy Policy, and Queen’s University has no liability for any independent interaction you choose to have with Turnitin.
Portions of this document have been adapted, with permission, from the University of Toronto Centre for Teaching Support and Innovation tip sheet “Turnitin: An Electronic Resource to Deter Plagiarism”.