Google Chrome is the recommended browser when using onQ. We strongly recommend that you use Google Chrome especially when taking a Quiz in onQ
AND
check that your browser and operating system are up to date.
Google Chrome is the browser that will give you the best possible user experience.
Other Supported Browsers
More information on supported browsers from Brightspace.
To find out if your Google Chrome is running the latest version, visit the WhatIsMyBrowser.com site.
Don't have Google Chrome on your computer? No problem! Visit the Google Chrome site to download it now.
Log in to onQ at https://onq.queensu.ca
There are two ways to access your course(s).
- From the navbar, click Select a course, and choose a course from the list or search for it.
- From the home page, click a course from the My Courses widget.
To easily access your current semester courses, you can pin them to the top of the Select a course list.
- From the navbar, click Select a course.
Type the name of the course that you want to pin or find it by searching in the Search for a course field. - Click the Pin icon beside the course.
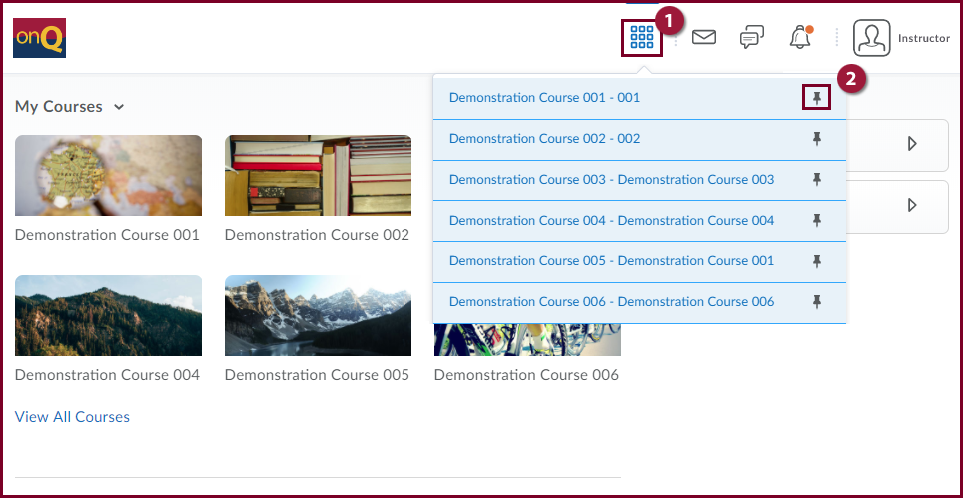
Note: From the Select a course... menu you are able to "pin" courses to the top of the list by selecting the pin icon on the right side of each course.
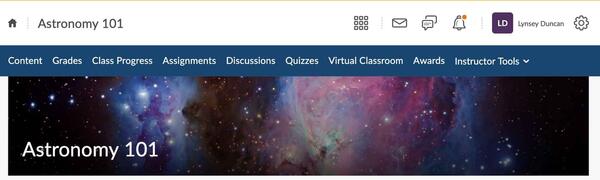
All onQ courses follow the same navigation system with the exception of Arts and Science online.
- To access your course, click Select a course... (#4 waffle icon on the top row). A list of your courses will be displayed.
- When you select a course you will land on the Course Home (#9 on bottom row).

- onQ - this will take you back to the onQ homepage from anywhere in onQ.
- Course Code
- Course Name
- Select a course... - navigate to any of your courses from this link.
- Message Alerts - access the Email and Instant Messages tools.
- Updates Alerts - view course updates to News, Discussions, Quizzes, etc.
- Chatter Alerts - shows new Discussion tool messages.
- Profile - access and edit your profile, customize notifications for activities in your courses, modify your account settings, and access the Logout link.
- Admin Tools - access to course import/export/copy components, and other admin tools dependent on your role in onQ.
- Course Home - the landing page of your course may contain the following widgets, Instructor contact information, calendar, resources, and news.
- Content - access course materials in Content, these can include documents, images, media files, presentations, URL links, and existing course activities.
- Communications - the following tools are found under this menu, Chat, Classlist, Discussions, Groups, Announcements, and Calendar.
- Assessments - the following tools are found under this menu, Assignments, Grades, Quizzes, Self Assessments, Surveys, and User Progress.
- Administration - the following are found under this menu:
Course Admin - access all tools related to setting up and managing your course.
Ventus - a direct link to view the Ventus accommodations for this course.
Note: Any images that you include with the My Courses widget are available to include in the course components that you export, copy, or import.
In the My Courses widget on your homepage, the courses display a default image assigned from the curated image library. You can also select an image that is more representative of the course from the library provided by onQ, or add your own image for the course tile. it is recommended that the image you upload is 2400 by 960 pixels to ensure that the image you select displays
To change the default image, do the following:
- Navigate to your the onQ homepage by clicking on the onQ Logo.
- Hover over the course image and click the More Options menu, an ellipses button will appear that provides the option to pin the course or change the image.
- Select Change Image or press Enter.
You now have the option to:
- Search the list of available images.
- or Upload an image of your choice.
- Once you have selected the image you want to use, hover over the image and click Use this image.
The following video provides a guide for how to edit the course homepage and widgets in your onQ course:
The homepage is the first page you see when you enter a course. The default homepage is widget-based. Widgets are sections of content that provide information and links to tools, courses, and personal settings. You can create, edit, delete, customize, and preview the widgets.
There are two types of widgets available for your homepages
- System Widgets
- Custom Widgets
Edit the Course Homepage
Note: To edit the course homepage you must first make a copy of the default onQ Course homepage. Once you have made a copy can add or remove widgets, customize their appearance, and create custom widgets to expand the functionality.
- Select the Administration link in the navbar then Course Admin and click on the Homepages option.
- Locate the onQ Course Homepage and click the dropdown arrow located to the right of the name.
- Click Copy.
- To add or remove widgets click on the name of the new copy of the onQ Course Homepage.
- You now have the option to:
- Enter a new name and description for your homepage.
- In the Type drop-down list, select from Widget-based (default), tool-based or External URL.
- To add a header to your homepage below the navbar, select Include homepage header.
- Enter the replace string of the information that you want it to display. Replace strings are placeholders that refer to information in the onQ Learning Environment; the system replaces these placeholders with the corresponding information when you apply them to a homepage header.
- To choose a layout for a widget-based homepage, click Change Layout.
- To add widgets to your homepage, click Add Widgets.
Select widgets from the system or custom widget lists. - Click Save and Close.
- You must now make the new homepage Active for your course.
Make the New Course Homepage Active
- On the homepages tab, locate the Active Homepage drop-down.
- Click on the drop-down arrow and select your new homepage.
- Click Apply.
Removing a Widget from your Homepage
- Select the Administration link in the navbar then Course Admin and click on the Homepages option.
- Select the homepage that you wish to delete the widgets from the list at the bottom.
- At the bottom under Widgets, a preview of the layout will be displayed.
- Hover over the widget, and click the 'x' in the upper right corner of the widget to remove it from the homepage.
Permanently Deleting a Widget
Note: Only Primary Instructor, Instructor, and Instructor No SN roles have the ability to permanently delete a widget.
- Select the Administration link in the navbar then Course Admin and click on the Widgets option.
- Under the Custom Widgets tab, find the Widget you wish to delete.
- Next to the name of the widget, click the 'delete' icon.
- Confirm by clicking 'Delete'.
We've created a Contact Information Widget on the course homepage for you. This is where you can insert your contact information as well as office hours and TA Information. Follow the steps below to edit the Contact Information Widget.
- Select the drop down arrow beside Contact Information.
- Select Edit this Widget.
- Click on the Content Tab.
- Insert your contact information using the HTML editor.
- Click Save and Close to confirm.
The following video provides step-by-step instructions for how to create an announcement:
Note: Announcement items with availability restrictions will not appear until the specified date is reached.
- Find the Announcements Widget on the course homepage by selecting Course Home in the navbar.
- From the Announcements widget menu, click New Announcements Item.
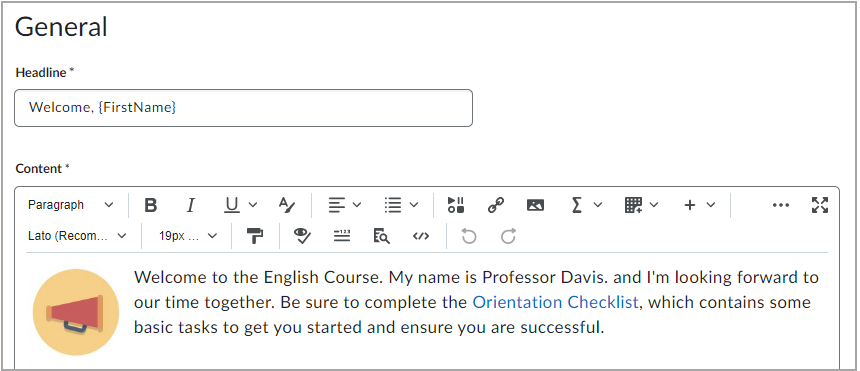
- Enter a headline and content for your Announcements item.
If you want to hide your headline's date and time, clear the Always show start date check box. By default, an Announcements item start date and time appears below the headline when displayed in the Announcements widget. - In the Start Date and End Date fields, select the posting availability date. Announcements items publish immediately, unless you specify an alternate start date from Start Date.
Note: Post-dated Announcements items do not display in the Announcements widget even if users have permission to see future Announcements items. They can be found within the list of Announcements items on the Announcements page. - You can remove an Announcements item on a specific date by selecting the Remove Announcements item based on end date check box. You and administrators can still see the Announcements item after its end date, but it does not appear in the Announcements widget.
- In the Attachments section, add attachments, audio recordings, and video recordings as part of your Announcements item.
- To include additional release conditions, click Attach Existing or Create and Attach.
- To continue editing the Announcements item, click Save as Draft. Students cannot see draft Announcements items. To release Announcements item to users, click Publish.
Create an Announcement
To create an announcement using the Announcements widget
- From your Course Homepage, locate the Announcements widget.
- Click the drop-down menu next to Announcements.
- Click New Announcement.
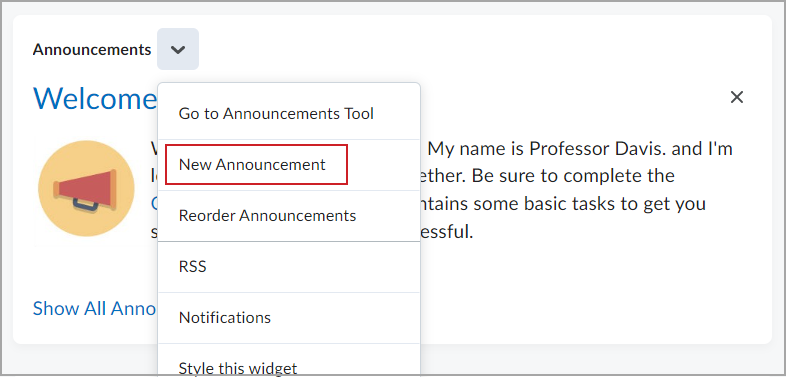
Figure: Click New Announcements from the Announcements drop-down menu.
- Add a Headline and Content for your announcement.
- Do one of the following:
- Click Publish to publish the announcement to your course.
- Click Save as Draft to save your progress and return later to publish your announcement.
- Click Cancel to remove your draft announcement.

Figure: You can Publish your announcement, Save as Draft, or Cancel and discard your changes.
Your announcement is posted to the Announcements widget and available to learners from the course homepage.
Display all upcoming events to learners in one spot. Post events such as project due dates, office hours, in-class events and more to the calendar.

Figure: Overview of the Calendar tool interface.
Access the following features:
- Use the calendar views area to toggle between different event display layouts.
- Use the Agenda view to group your course events by Date, Course, or Category - events display in chronological order, and all-day events display at the top of each grouped listing.
- Use the Day, Week, and Month views to group your events in daily, weekly, or monthly increments.
- Use the List view to filter your events by Assignments, Checklists, Discussions, Grades, Materials, Modules, Quizzes, and Surveys.
- Use the calendar content area to navigate through your content. Navigation varies depending on the view you select.
- Use the calendar menu to select multiple calendars to display, change the color scheme associated with individual calendars, and add new calendars.
- Use the mini calendar to navigate quickly to a specific day, week, or month.
- Use the task pane to create, track, and maintain personal tasks.
Create Course Events in Calendar
- On the navbar, click Calendar.
- Click Create Event

- From the Create Event page, do the following:
- To associate course content with the event, click Add Content. Select the module from which you want to add content. Click Add.
- If you've associated course content with the event and want to use a custom name for the event, select the Use custom name check box. Enter a name for your event.
- If you have not associated course content with the event, enter a name for your event.
- To add date and time details to your course event, in the When area, click on the provided fields.
- To add recurrences to the event, click Add Recurrence. Enter your event recurrence details.
- To add restrictions to the event, click Add Restriction. Enter your event restriction details.
- Click Create.
The event is created and added to your calendar.
Note: You can add start and end date restrictions to Quizzes, Assignments, and other tools, which are then automatically populated in your course calendar.
The following videos provide step-by-step instructions for how to copy content to your course:
- In the course offering that you want to copy components into, on the navbar, click Course Admin then Import/Export/Copy Components.
- Select Copy Components from another Org Unit. Click Search for offering and locate the course offering containing the components you want to copy. Click Add Selected.
- Do one of the following:
- To copy all course components, click Copy All Components. We recommend that you copy all components between courses to ensure you maintain all desired associations, and then delete any undesired material in the new course.
- To specify the components you want to copy, click Select Components. Select your components. To see details for course components, click the Show the current course components link, then click the View Detail icon beside a component to see existing items. For those course components that provide the option to include associated files, D2L recommends leaving the option turned on. Click Continue.
- Select the Offset all dates of copied components check box and specify the days and hours that the dates should be offset by or calculate the range between two dates.
- Click Finish.
- Do one of the following:
- To copy another package, click Copy Another Package.
- To see the results of your copy, click View Content.
- To review and manage course dates, click Review and Manage Dates.
If your course is not active then your students will not see it in onQ!
If you have a Start and End Date set in your course, these dates determine when your course will become ‘active’ (Start Date), or visible to students, and when the course will return to being ‘inactive’ (End Date), or invisible to students.
If the Start and End dates are not set, you will manually need to activate the course.
To check the Start and End dates in your Course:
- Select the Administration link in the navbar then Course Admin and click on the Course Offering Information.option.
- Under Active, check the box Course is active.
- Under Start Date, check the box Course has start date. Enter the desired course start date and time.
- Under End Date, check the box Course has end date. Enter the desired course end date and time.
- Select Save to confirm changes.
If you do not have a Start Date set to activate your course, you can follow these steps to manually set your course to active:
- Select the Administration link in the navbar then Course Admin and click on the Course Offering Information.option.
- Under Active, check the box beside Course is Active.
- Select Save to confirm changes.
Some tools in onQ are not enabled by default. To enable more tools:
- Select the Administration link in the navbar then Course Admin and click on the Tools option.
- From this page, you can enable the tools you would like to use by toggling the button on the right of the tool to the blue checkmark.
- Once you have enabled all of the tools you would like to use, reload the page and you will find the new tool on the navbar under its respective dropdown menu.