The Queen's image includes:
- Windows 11 Education (current release or current release -1)
- Microsoft 365 Apps for enterprise
- Microsoft Defender Antivirus
- Microsoft OneDrive Sync Client
- Adobe Reader DC & Pro Unified
- Mozilla Firefox
- Google Chrome
- The option to join our Active Directory (AD) domain
- BitLocker encryption is enabled if you join AD
- ** If you choose not to join AD and instead setup as a Workgroup, please visit our Encryption Service page to ensure your data is protected
By choosing the Queen's image you avoid most of the trial software that usually ships with Dell computers and instead get the latest version of Queen's supported software.
Requirements:
- Access to a physical LAN connection at Queen's is required
- ** If you are at HOME, off-campus, or are in a building/office that uses a non-standard network setup (Static IP, Firewall, etc) you must uncheck the "Join Computer to Active Directory" as shown in the "How to Set Up Your Queen's System" tutorial below.
- XPS Laptops without an Ethernet port will require a USB-C Ethernet dongle ( Dell Part# : 470-ABND - purchased separately)
NOTE: The step-by-step instructions in the "How to Set Up Your Queen's System" tutorial below are crucial to the success of the standardized build. Failure to follow these instructions may result in the need to have your system rebuilt at the IT Support Centre.
Please reach out to your respective department to determine if there are additional specifications required
Receiving imaged computers at a remote location (off-campus):
If you receive and set up a Dell computer with the Queen's Image at a remote location, you must uncheck the option to "Join Computer to Active Directory" as shown in the "How to Set Up Your Queen's System" tutorial below. When the "Join Computer to Active Directory" box is selected, the device must complete a build process that requires a physical connection to the Queen's network. You will be able to join the network (and Active Directory, if desired) after the build is complete by contacting the IT Support Centre.
By joining AD your are following the ITS best practice for the security of your computer. For complete details on our AD service please visit our Active Directory (AD) service page. In addition to the benefits received by joining AD, the Queen's image includes these additional security features to help secure your computer when the AD build option is selected:
- Users log in as standard users, not administrators (helps protect against phishing, malware, and ransomware attacks)
- ITS will provide administrative access upon request by the Department
- Microsoft Endpoint Configuration Manager (MECM) is included and manages your antivirus and Windows Updates.
- BitLocker Encryption is enabled by default and your recovery key is securely backed up in AD
Step-by-Step Setup Instructions
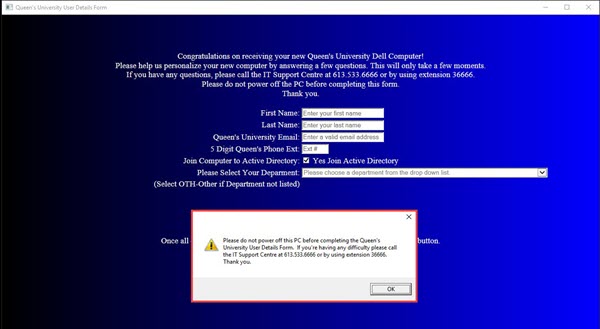
- Once the computer arrives and you plug it in and turn it on, you will be presented with the Queen's University User Details Form with a warning box overlaid. Do not turn off your computer during this setup sequence:
- Do not power off this PC before completing the Queen's University User Details Form
- If you are having difficulty call the IT support Centre at 613.533.6666 (36666)
- Click the OK button to continue.
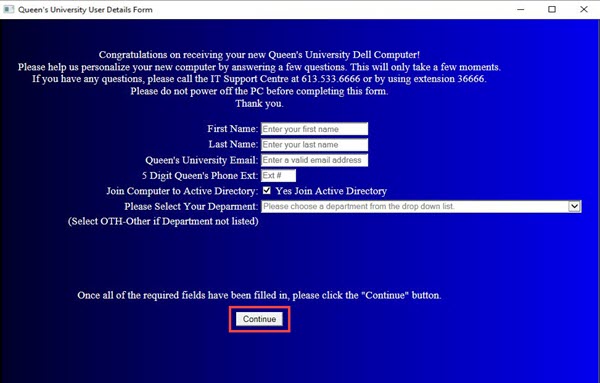
- After you click the OK button, you will be able to fill out the form with your information
*NOTE* - If your department is not using AD, or you are located at HOME, or are located in a building/office that uses a non-standard network setup (Static IP, Firewall, etc) you must uncheck the "Join Computer to Active Directory" option. You will then be presented with fields to set a local administrator username and password. These will be used in step 8. The computer can be added to AD following the build. ITS recommends using AD so if you would like to get more information on how to join please call the IT Support Centre at 613-533-6666.
- By default, the Join Computer to Active Directory is checked
- Complete the rest of the form
- Click the Continue button
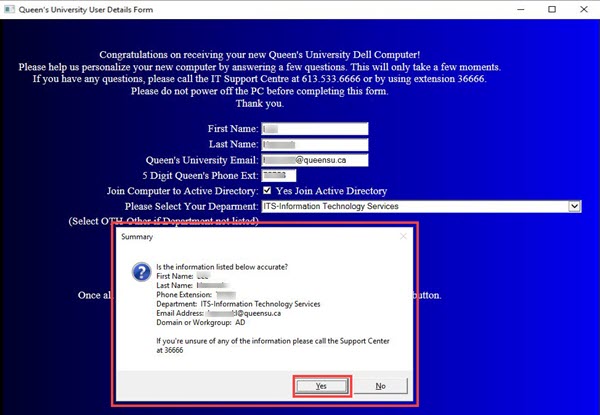
- The Summary screen will open
- Verify that your information is correct.
- When ready click the Yes button
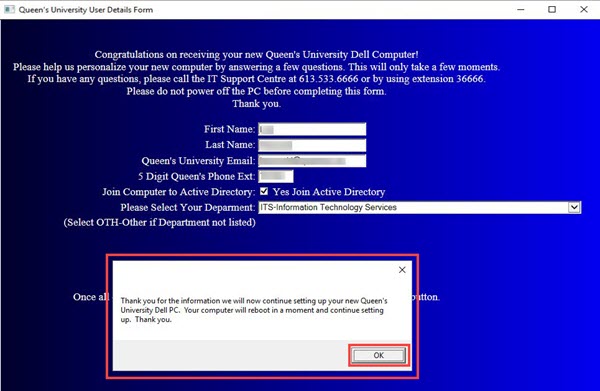
- Another dialog box will open explaining that the remainder of the setup process will now continue and your computer will restart.
- Click the OK button to proceed
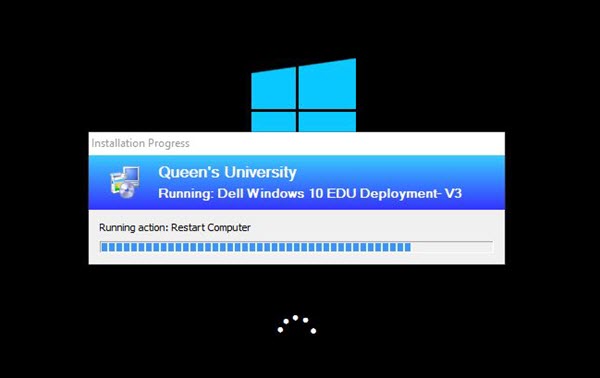
- The Installation Progress screen will open
- After the installation is complete your computer will restart and finish the setup process
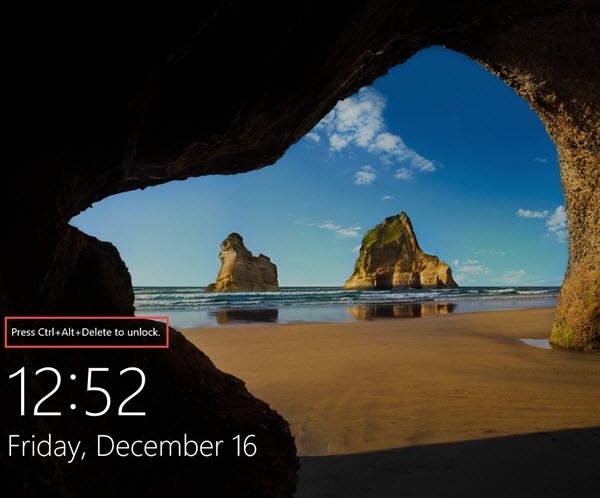
- When the setup process is complete you will see the Windows 11 logon screen.
- If you joined your computer to AD you will need to press CTRL+ALT+DEL and then login with your Queen's NetID and password.
- If you encounter any problems when trying to login, please call the IT Support Centre at 613-533-6666
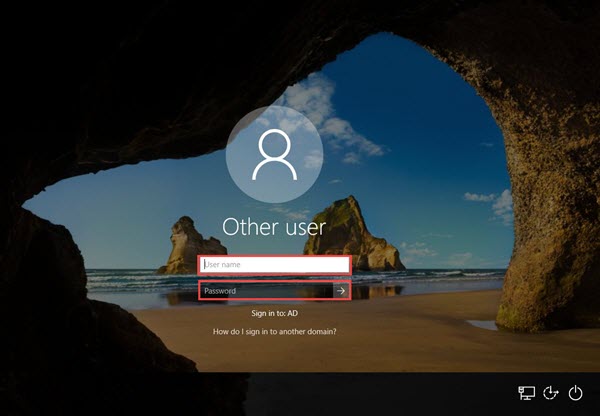
- When the setup process is complete you will see the Windows 11 logon screen.
- If you chose not to join to AD you will need to click the mouse button and then enter the username and password you created in Step 3
- If you encounter any problems when trying to login, please call the IT Support Centre at 613-533-6666
- After you enter your credentials and log in you will see the profile setup screen below
- Login will continue

- After a few minutes you will be brought to your desktop and will be ready to start using your computer!
- Click the Start button in the lower left corner to open your software.

- Congratulations! You are now logged in to your new computer with a standard user account (if you chose to join AD). If you or your IT department staff require administrative access to this computer, please have the IT Admin rep for your department contact the IT Support Centre at 613-533-6666 to let us know the build is complete.
By joining AD your are following the ITS best practice for the security of your computer. For complete details on our AD service please visit our Active Directory (AD) service page. In addition to the benefits received by joining AD, the Queen's image includes these additional security features to help secure your computer when the AD build option is selected:
- Users log in as standard users, not administrators (helps protect against phishing, malware, and ransomware attacks)
- ITS will provide administrative access upon request by the Department
- Microsoft Endpoint Configuration Manager is included and manages your antivirus and Windows Updates.
- BitLocker Encryption is enabled by default and your recovery key is securely backed up in AD
The Queen's image comes with many of the privacy options disabled by default. These can all be re-enabled to suit your needs with the exception of Cortana.
Default Privacy Options
Windows 11 has a number of privacy options disabled by default. These include:
- Advertising ID
- Send writing info to Microsoft
- Search online and include web results
- Speech, inking, & typing - "Get to know me" feature
- Location Service
- Sync with Devices
For more information on all Windows 11 Privacy settings please visit Privacy at Microsoft.