
Images can enhance a page by breaking up text, supporting key messages, and making content more engaging for visitors. When used thoughtfully, they help communicate information more effectively and improve the overall user experience. To ensure accessibility and usability, images should be relevant to the content and include appropriate alternative text whenever needed.
Adding Images in WebPublish
- Open the Image Dialog

Users can add an image by clicking the Insert Image via URL button in the toolbar. Browse for an Image
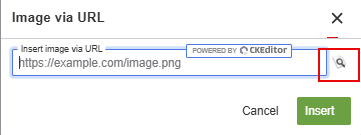
Click the Magnifying glass icon to open File Browser and select an imageUpload and Select

Once the File manager is open, click Upload
Click Add File and navigate to the desired folder, once selected click Open

Click on the desired file and click Select
The URL now should be visible on the dialog box
Insert the Image
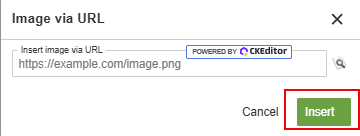
After the URL is visible, click the green Insert button
After the image is added, enter appropriate Alternative Text to improve accessibility, then click the green Checkmark icon too save
If the image added is for decorative purposes, turn on the Decorative Image toggle
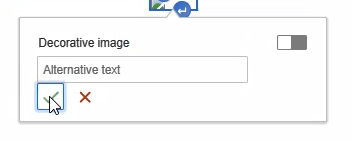
Image Options

- Alternative Text. Add or edit alternative text for accessibility.
- Break Text. Place image on its own line and move surrounding text above and below it.
- Align Left and Wrap Text. Align the image to the left and wrap text around the right side.
- Align Center and Break Text. Center the image on the page with text displayed above and below it.
- Align Right and Wrap Text. Align the image to the right and wrap text around the left side.
- Inline. Display the image within text flow as if it were a text character.
- Toggle Caption. Show or hide a caption below the image.
- Resize Image. Adjust the image dimensions while maintaining the desired layout.
- Link Image. Add a hyperlink so the image opens a page, file, or website when selected. See Links and Anchors page.