This paragraph is only available in the WebPublish for Academia service.
View a demo site to see this paragraph in action
Guidelines for using this paragraph
- This block is always used at 100% width of the browser window.
- Do not place academia bio blocks on top of each other
Make sure your image is appropriately cropped and the face of the person is easily discernable.
- use on a homepage or profile page to introduce yourself to site visitors
- highlight key aspects of your work and professional career
- The image will stack on top of the name, position and description fields
- This layout will likely make the block taller and slimmer than on desktop display
How to use this paragraph
- Create a Basic Page or Homepage
- To insert the Academia Bio in the hero section of your homepage (i.e., just below the menu), scroll to the Paragraphs top section, click the drop-down and select "Add Academic Bio". Otherwise, to add it to the regular homepage or basic page content scroll to the "Layout options using paragraphs" section, click the drop-down arrow and select "Add Academic Bio"

- When the paragraph loads, you will be at the bottom. Scroll back up to the top of the Paragraphs section.
- Review the Overview of an Academia Bio section of the guide below
- Once you've added your photo, name, bio title and bio body as desired, click "Save"
Overview of an Academia Bio
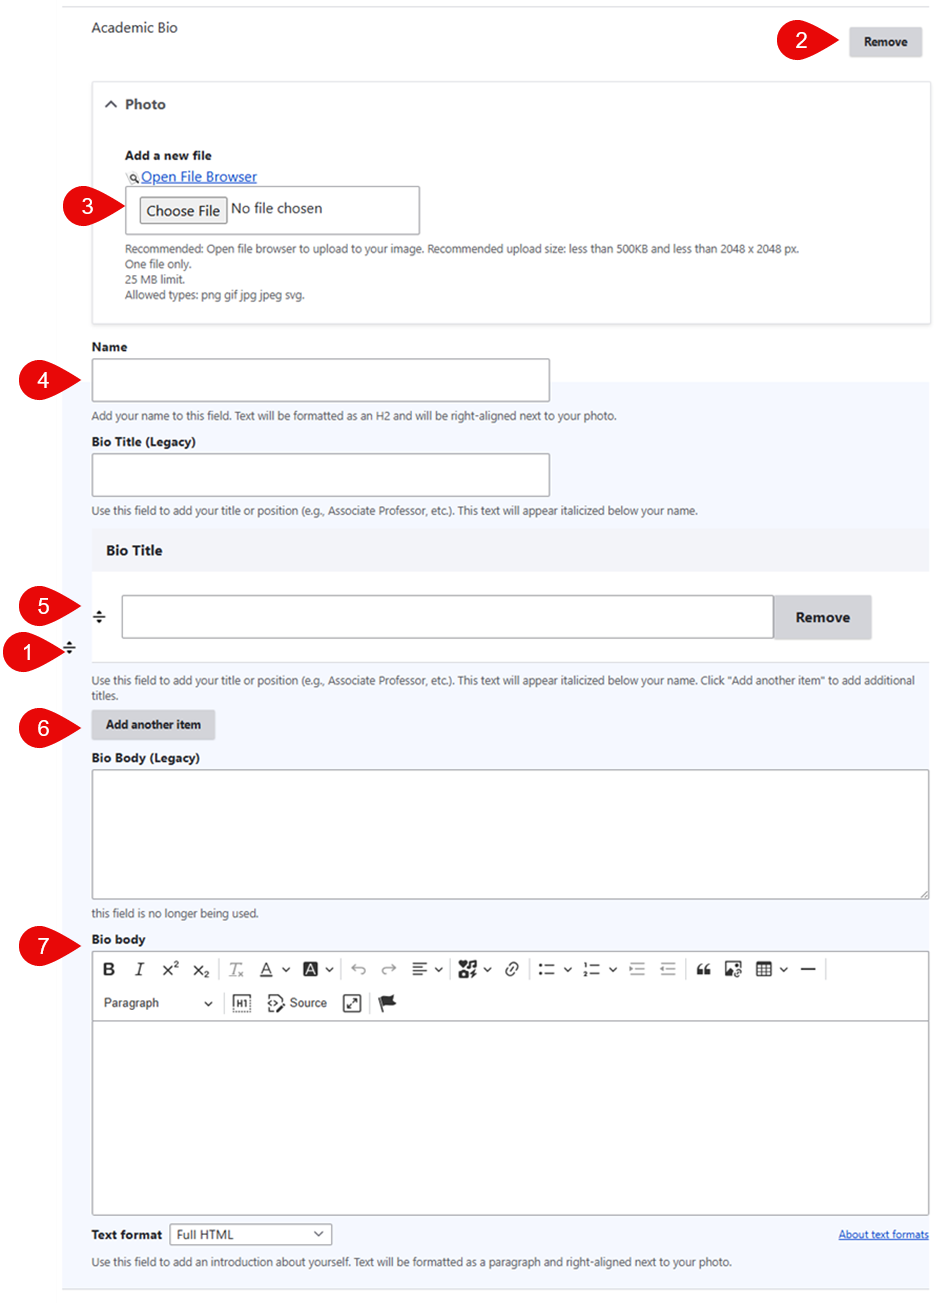
- Grab the crosshairs to rearrange your paragraph relative to the other content on your page
- Remove this paragraph from your page
- Photo: upload an image, such as a professional headshot. Recommended: click "Open File Browser" to upload your image. This will add the image to the site's central file repository, making it easy to reuse the image in the future. The photo will appear on the left side of the paragraph.
- Name: add your name to this field. It will be formatted as a Heading 2 and will appear to the right of your photo.
- Bio Title: add your title or position. This text will appear italicized below your name. Click the crosshairs to rearrange the order of your titles.
- Add Another Item: use this button to add additional titles.
- Bio Body: use this field to add an introduction about yourself. Text will be formatted as a paragraph and right-aligned next to your photo.