View the example page to see this paragraph-type in action.
Guidelines for use
- This paragraph is always used at 100% width of the browser window
- Consider where the focal point of your background image is, and align the content in the section with your best attempt to not overlap it.
- If your image has a lot of bright and dark areas, you may have legibility issues with your content. Consider either a new image or re-cropping your image in a different way.
Elements
Colour Overlay: This is the colour that will overlap the image
Image: This is the image that will be displayed as a banner.
Title: An optional <h2> heading that will appear on top of the image, according to selected alignment (left, center or right). Maximum character count: 100.
Body: Optional <p> paragraph text that will appear on top of the image, according to selected alignment (left, center or right). Maximum character count: 300
Button: Optional. A link with custom text and button styling will appear on top of the image,according to selected alignment (left, center or right). Maximum character count on link text: 50 characters.
Use this Image (Banner) paragraph to highlight an important section of text or call to action.
Since the ability to move content from left to center to right is removed, the banner content is displayed below the image section to ensure good legibility.
How to implement
-
Create a Basic Page.
-
Scroll down to the Paragraphs section, click the drop-down arrow, and click "Add Image (Banner)"
-
Proceed to the Overview of an Image (Banner) section of this page
-
Once you've added your Image (Banner) content, choose your publishing options and click Save at the bottom of the page.
Overview of an Image (Banner)
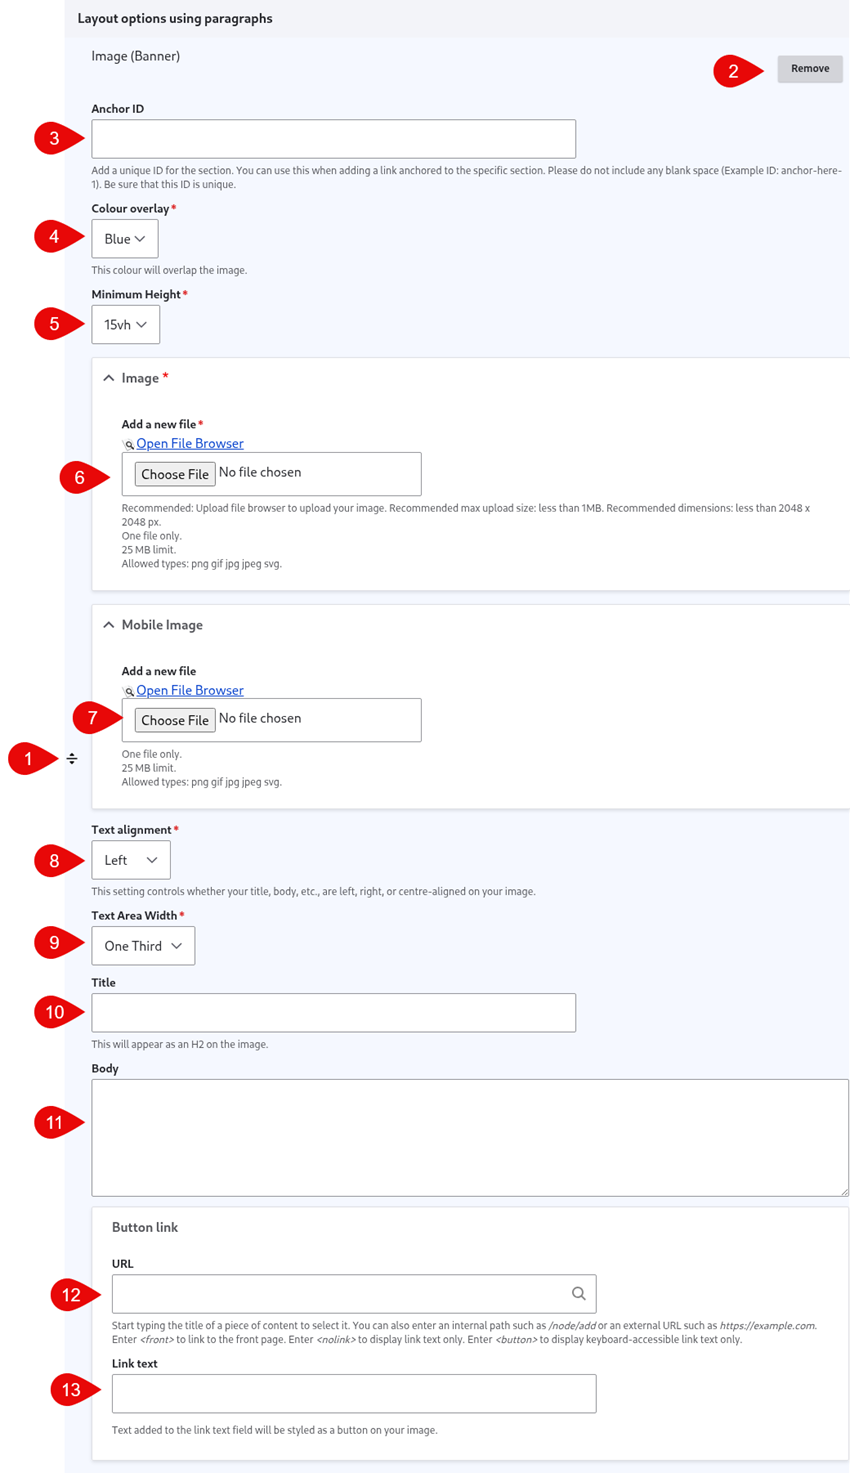
- Click and drag the crosshairs handle to rearrange your paragraphs.
- Remove this entire paragraph.
- (Optional) Anchor ID: Add a unique ID, if you would like to link to this specific section of the page from another location.
- Colour overlay - the colour selected will overlap the image
- Minimum Height - if you are not adding text to your banner, you can increase the minimum height of the image to ensure it is visible.
- Image - the image will span the width of the page with the colour overlay and any text appearing on top.
- (Optional) Mobile image - you can optionally add a mobile version of the image, if there is a specific section of the image on desktop that you'd like displayed on mobile.
- Text alignment - this will determine where any text (title, body, button) is placed on the image.
- Text Area Width - select from widths of 1/3, 1/2 and 2/3 of the page for text to span on the banner
- (Optional) Title: Add a title for the banner image - it will appear on the image according to your selected alignment
- (Optional) Body: Add a paragraph of text for the banner - it will appear on the image according to your selected alignment.
- (Optional) URL: Add a reference to an internal or external page to be included. A link will be added with button styling - it will appear on the image according to your selected alignment
- (Optional) Link text: the link text will be displayed in the button styling on the image.