Prerequisites
To make use of WebPublish for Developers, users will need significant expertise in HTML, CSS, PHP, Git, Drupal, Composer, and Drush. Users should also have a very basic understanding of Docker, Linux, Apache, and Azure DevOps CI/CD Pipelines. WebPublish for Developers should only be used for units that have their own dedicated web developer/team and in instances where they require custom modules and themes that can't be fulfilled using alternative methods.
Overview
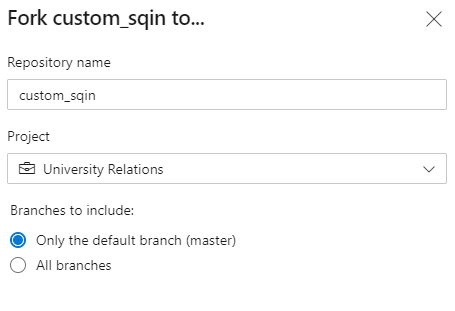
WebPublish for Developers is essentially just a recipe, the same recipe ITS uses to build the WebPublish 3 Comprehensive. The recipe is forked into your own Azure DevOps Repository and connected to Azure build and deployment resources.
Provisioning and Initial Training
After requesting an account and receiving approval from the Website Governance Committee, your site will be provisioned by the ITS WebPublish team and a training session will be arranged. The initial training will cover an overview of DevOps Repo and Pipeline functionality as provisioned for WebPublish for Developers.
Initial Setup
- Login to Azure DevOps
- Click on your project
- Navigate to Repos

- Click Clone button

- Click the Generate Git Credentials button

- Save the provided personal access token
- Clone the repo to your workstation for local development
Customizing WP3
You can add themes, modules, and profiles to your fork of the repo. To customize your instance of WebPublish for Developers, you can run composer commands from your workstation and commit the resulting changes in the composer.json and composer.lock files to the repo. The composer-diff plugin can be used to review changes between the upstream and your fork.
- Install composer-diff
composer global require ion-bazan/composer-diff - Add the upstream remote
git remote add upstream https://WebPublish3@dev.azure.com/WebPublish3/Public%20WebPublish3/_git/Public%20WebPublish3 - Run composer diff
composer diff -b master -t upstream/master
Admin Scripts
Review the Admin folder in the repository to see the available admin scripts. More documentation will be added to this section later but for now you can review the code in the repo to follow how the scripts work and what inputs are needed. You may add additional admin scripts to your own repo fork.
Upstream Update Process
When new updates are available from the Public WebPublish3 repository, use this process to integrate them into your WP3 fork.
De-customize Prior to Pull Request
Prior to running a pull request from the Public WebPublish3 repository to update your fork, you must first restore your composer.json and composer.lock files back to a clean un-customized state or the pull request merge will fail. Ensure your de-customization process includes "[skip ci]" in the commit message to prevent the build and release pipelines from triggering automatically.
Pull Request
- Navigate to Repos
- Click Pull requests
- Click New pull request
- Ensure that "Public WebPublish 3" repo is on the left and your project's repo is on the right

- Review the files and commits, fill out the title and description, click create.
- If no merge conflicts exist, click complete. Ensure that your commit message contains either "Merged PR" or "[skip ci]" to ensure the build and release pipelines are not triggered automatically.
- Use composer diff to figure out what custom packages (modules, themes) you need to add back in.
Theme and Profile Forks
Along with the main Public WebPublish3 repo, you will also be provided access to the basic and custom WP3 themes and profiles. You can fork these repos into your own project to create unit specific versions. You will also be able to use the pull requests to merge in changes the primary versions of these forked repos.

Deployment
Deployment to the dev server happens automatically on every repo commit unless you add "[skip ci]" to your commit message. To deploy to prev or prod:
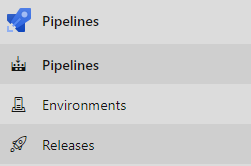
- Navigate to Pipelines => Releases
- Click the prev or prod stage button next to the release
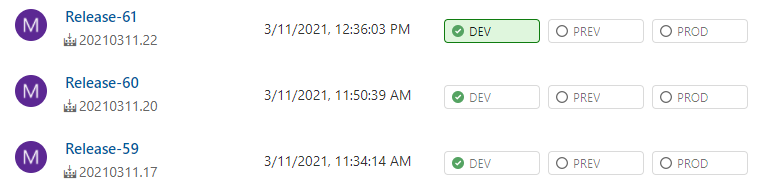
- Click deploy

- Click deploy